
Docs /Getting Started
Interface Layout
LeaRes’s interface is designed for efficiency and clarity, with dedicated areas for data management, 3D visualization, and tool access. This guide will help you master the layout and controls so you can work confidently in both Medical and Engineering workflows.
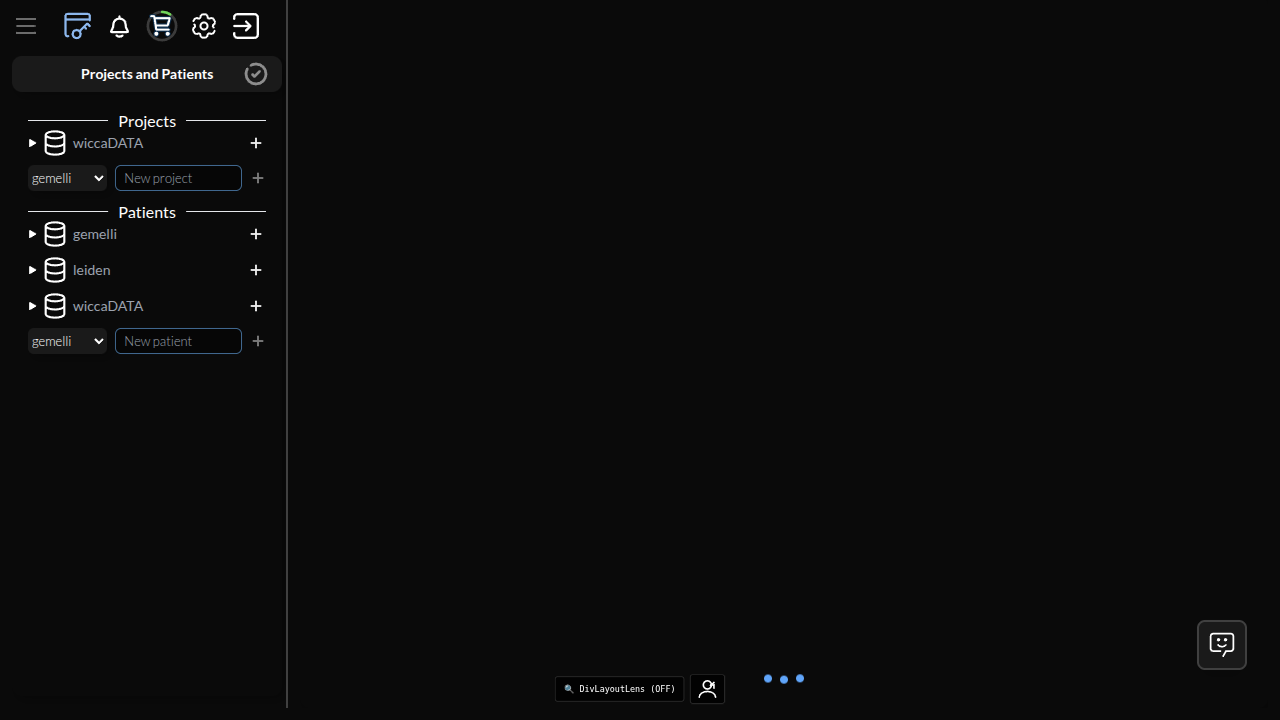
Main Interface Layout
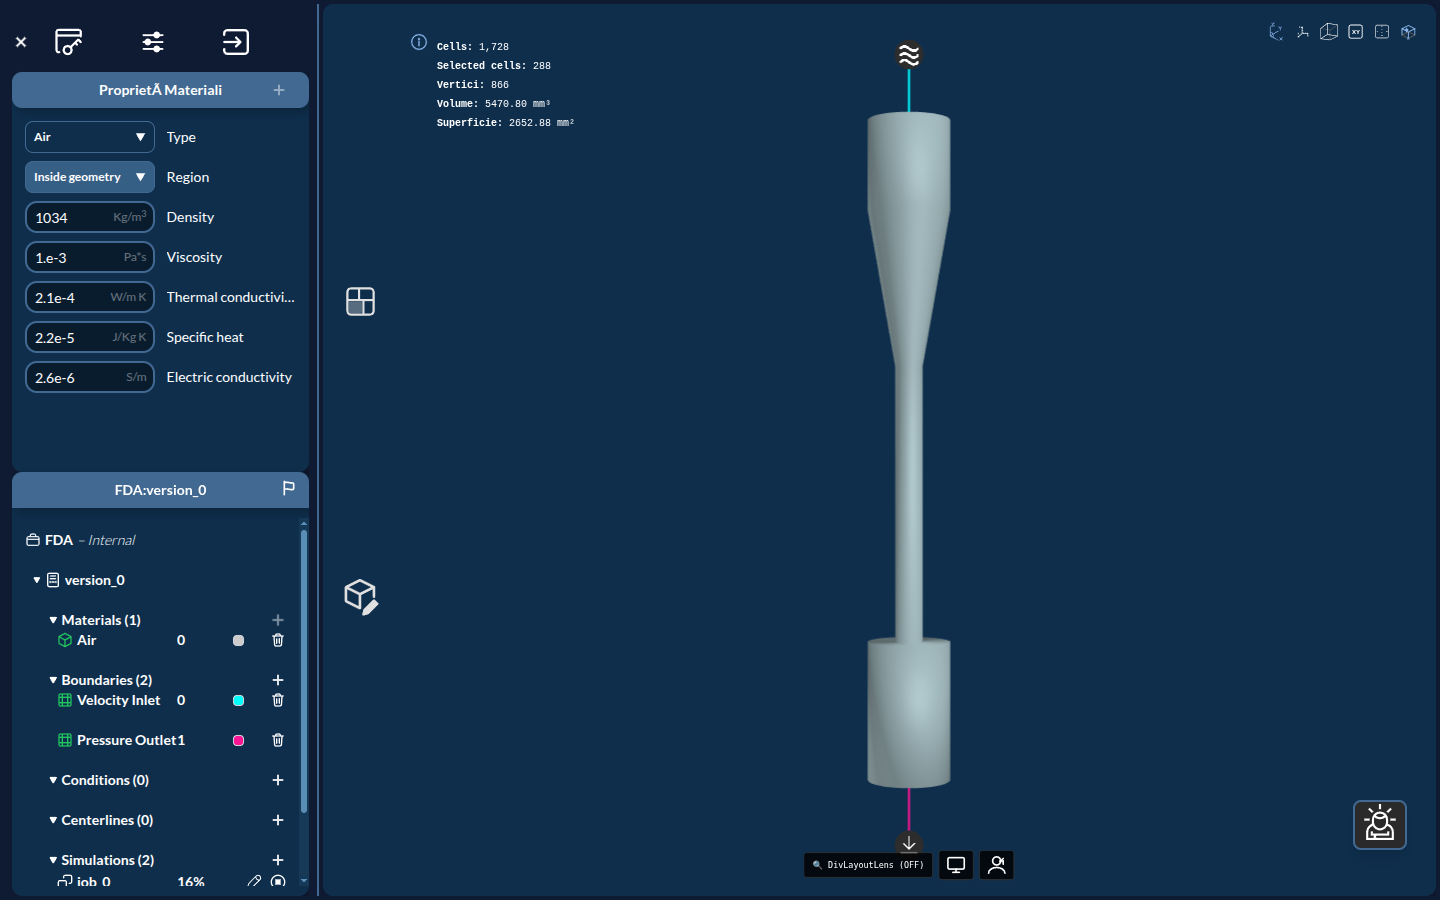
The LeaRes interface consists of four primary areas: the left sidebar (ActionsTree), the central 3D viewer (GView), the top toolbar (Topside), and the AI chatbot widget.
1. Left Sidebar (ActionsTree)
The ActionsTree is your navigation hub for managing patients, projects, and their associated data. Its hierarchy adapts to the active mode.
In Medical Mode (patients):
Patients/
├── Patient
│   └── Events/
│       └── Event (e.g., "PRE", "POST")
│           └── Series (e.g., "torso")
│               ├── Segmentations
│               ├── Viewer Poses
│               └── Virtual Spirometry Results
In Engineering Mode (projects):
Projects/
├── Project
│   └── Devices/
│       └── Device
│           └── Versions/
│               └── Version (e.g., "version_0")
│                   ├── Geometry
│                   ├── Materials
│                   ├── Boundaries
│                   └── Simulations
Actions you can perform:
- Click an event/series (e.g.,
PRE,POST,torso) to load it into the 3D viewer - Right-click an engineering geometry entry for its context menu
- Expand/collapse sections using arrow icons
Patients and projects themselves are opened by double-clicking them in the Projects and Patients window, not in the tree.
Tip: Data lives inside a database. Pick a database first (a button such as
wiccaDATA,gemelli, orleiden) from the Projects and Patients window, which opens at login.
2. Central 3D Viewer (GView)
The GView is where all 3D visualization happens, powered by VTK.js for real-time rendering. It shows whatever you load — a patient anatomy in Medical mode, or an engineering device in Project mode (such as the FDA nozzle from wiccaDATA → FDA).
Mouse Controls:
| Action | Control |
|---|---|
| Rotate | Left-click + drag |
| Pan | Shift + left-click + drag |
| Zoom | Scroll wheel |
| Select | Single click on geometry (when in selection mode) |
Single-view cycling (⇄ button):
The ⇄ “Cycle view” button rotates the active single view through the orthogonal planes:
3D → Axial → Coronal → Sagittal → (back to 3D)Viewer Controls:
The viewer toolbar offers the standard rendering controls:
- Reset camera — re-center the view to fit all geometry
- Perspective / Orthogonal view — toggle the projection
- Clipping planes — open the clipping modal (slider-based cross-sectional views)
- Toggle axes (during rotations) and Toggle metric box
- Toggle info — show or hide the overlay information
- Backface / Frontface culling — choose which faces are rendered
- Cycle view (⇄) — step through 3D → Axial → Coronal → Sagittal
Note: there is no screenshot or fullscreen button in the viewer toolbar. To change camera orientation (anterior, posterior, lateral, superior, inferior), use the AI assistant — see AI Assistant — Basics.
3. Top Toolbar (Topside)
The Topside toolbar provides quick access to common operations.
The Topside toolbar holds four buttons:
- Projects — opens the Projects and Patients window
- Notifications
- Settings — theme, account, two-factor authentication, and the cart that opens the Recharging Station (see Account, Tiers, and Credits)
- Exit — logs you out
There is no separate user menu: account settings and the theme selector live inside the Settings panel, and Exit is the logout control.
3b. Left Vertical Toolbar
The left vertical toolbar carries the workflow tools:
- Segment and Reconstruct (
#segment-and-reconstruct-button) — opens the segmentation/reconstruction panel (medical mode) - Image preset dropdown and colormap selector (see Image Presets and Colormaps)
- Measurement tools dropdown (see Measurement Tools)
- Viewer layout controls: the layout cycle button and the Compare button (see Viewer Layouts and Comparative View)
Switching Workflow Mode
The mode toggle (#panel-mode-toggle) is not in the top toolbar — it sits at the top of the Projects and Patients window. It is an icon button whose tooltip reads “Switch to engineering projects” in medical mode and “Switch to medical records” in engineering mode. It appears only if your account has access to both patients and projects.
Keyboard Shortcuts
Most of these have no tooltip in the interface, so they are listed here.
3D viewer — selection
| Key | Action |
|---|---|
| Hold Alt + click | Pick a cell, zone, or mask under the cursor |
| Escape | Deselect everything currently selected |
| Space | Invert the selection — select all other parts, deselect the current ones |
3D viewer — zones (engineering mode)
| Key | Action |
|---|---|
| Alt + A | Add a new zone |
| Alt + C or Backspace | Remove the selected zone |
| Alt + Z | Undo |
| Alt + Y | Redo |
Chatbot
| Key | Action |
|---|---|
| Enter | Send the message |
| Shift + Enter | New line without sending |
| ↑ / ↓ | Browse previous commands |
Note: Backspace removes a zone only when focus is not in a text field.
4. Chatbot Widget (Ask / Agent)
The AI-powered chatbot provides contextual assistance throughout your workflow.
How to use:
- Click the chat icon in the bottom-right corner (floating button)
- Type your question or describe what you’re trying to do
- Receive guidance in natural language (Italian or English)
Example queries:
- “How do I segment lungs from a CT scan?”
- “Simulate flow in the aorta of patient X”
- “What boundary conditions should I use for aortic flow?”
Smart Context: The chatbot is aware of your current mode and loaded data, and can drive automated pipelines end to end. See the dedicated AI Assistant guide for details.